My first keyboard build
15 August 2022 5 minute read
After my last blog post I gave up trying to find the perfect keymap layout.
There are so many pitfalls when designing a layered keyboard keymap, and I just
got tired of remapping keys all the time. So instead I tried to adopt the
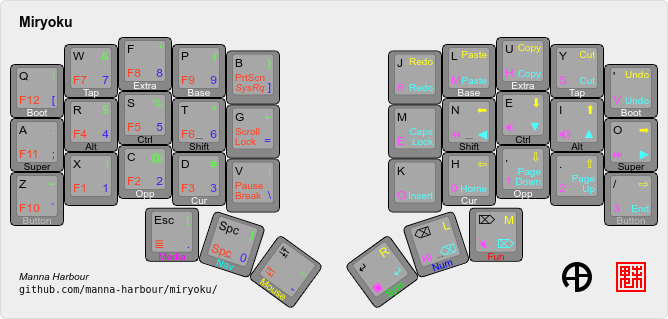
popular Miryoku layout, which is a
36 key layout that includes all keys from a full size keyboard in addition to
mouse emulation. It didn’t take long before I was sold on this.

Miryoku highlights
- Based on Colemak DH, allthough many other alpha layouts are supported, including QWERTY
- 6 layers on thumb keys for media keys, navigation, mouse, symbols, numbers and F-keys
- Homerow mods for easy access to modifier keys (shift, control, alt/option and super/command)
- Numpad style numbers, symbols and F-keys (e.g. 2 is also @ or F2 depending on which layer you are in)
- VIM-key style arrows, and the same keys are also used to control the mouse and media keys (e.g. right arrow, next track and mouse right has the same positions)
Finding the right keyboard in the haystack
So having decided on the layout, I just needed to pick a 36 key keyboard. But there’s so many open source keyboards with 36 keys out there, and to find the right one for my preferences actually took months of browsing on /r/ErgoMechKeyboards and kbd.news. New designs kept coming almost every week! The most popular ones are sometimes available as full kits, but they are mostly not in stock, and you have to join group buys on different Discord servers. I tried to order parts for the 3W6 keyboard, but then the pcb manufacturer didn’t have the usb connector part, and fixing that meant learning KiCad and redesigning the PCB layout and possibly also the casing.
These were my goals:
- Portable
- 36 keys for the Miryoku layout
- Aggressive pinkie stagger
- Cheap
- USB C
- Easy to build
Let me explain a little bit what some of these properties actually mean for a design.
Portable
Typically rules out all MX-style switches since they make the keyboard too thick. A wireless build would make the keyboard very portable since, and if you’re working on the train this will declutter your setup. But since I also wanted it to be cheap, I had no problem using a cable as long as it’s USB type C.
Aggressive pinkie stagger
A traditional keyboard is row staggered while ergonomic keyboards are either ortholinear (every row is like a straight line) or columnar staggered (the rows are curved to match the shape of your hand). Pinkie stagger refers to how much lower the outermost pinkie column is compared to the others. The popular Ferris keyboard by /u/pierrechevalier83 was, as far as I know, the first to popularize this. Many people use the term “Ferris-like stagger”, or just aggressive pinkie stagger.
Cheap
The microcontroller unit (or MCU in short) is often one of the priciest parts of a keyboard. One of the most popular MCU’s is the Pro Micro, which is a mid-price usb-c type controller. The keyboard I built costed me 130$ including shipping and customs fee:
- 45$ for the switches
- 11$ for the Blackpills
- 13$ for 5 PCBs (with some discount code)
- 41$ for keycaps, jack connectors and cable
- 20$ in customs fee
And that new soldering station I bought we don’t talk about ![]()
Easy to build
Don’t ask me about the details, but to prevent something called N-Key Rollover, a diode must be placed on each switch. It increases the keyboard assembly time and complexity due to the extra components that needs to be soldered. The Blackpill MCU is a cheap, usb-c controller with more I/O pins than the Pro Micro, which allows for a diodeless build.
The Cantor-remix
Taking all these properties into account, I started to search for keyboards that would match all my goals. The one that seemed to fit the best was the Cantor keyboard by /u/diepala. The only drawback was it’s a 42 key layout, and I really don’t want extra dead keys on my custom build keyboard. Luckily, /u/glbyte posted on Reddit a modified version with only 36 keys - the Cantor-remix.
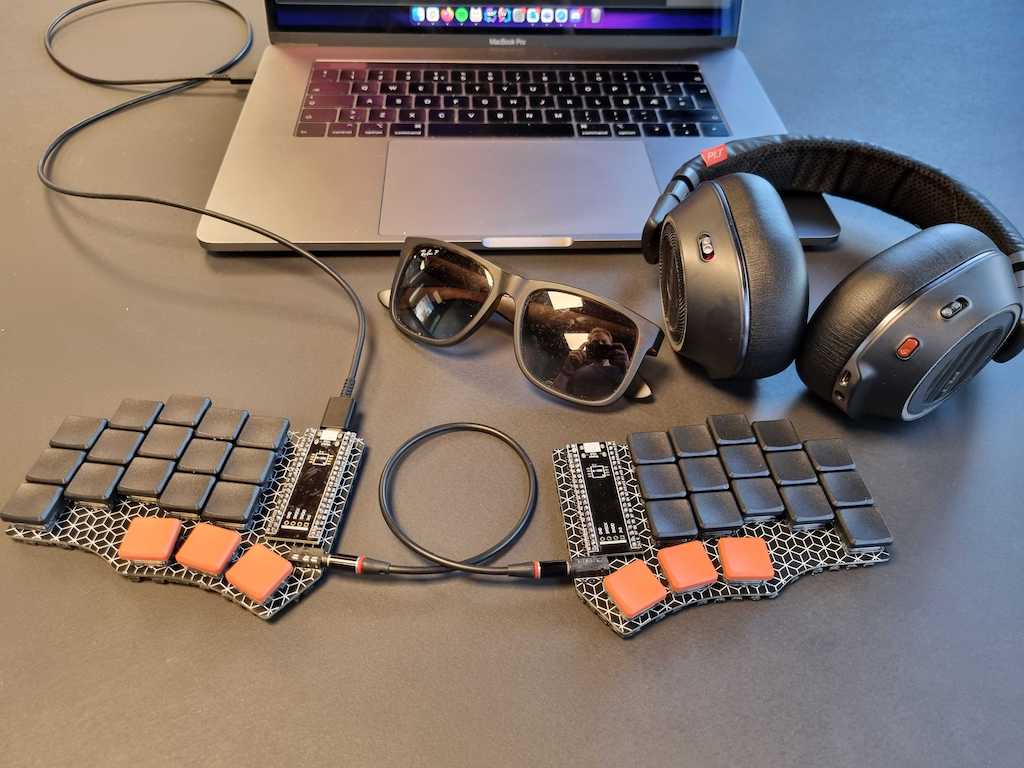
The result
 I ordered all the parts online and bought a soldering station. If you’re a
soldering newbie like I am, make sure you read up on soldering before you start
(I almost gave it up)! You can see more details in my post on
/r/ErgoMechKeyboards.
You can check out my curated list of open source keyboards I considered during this phase. This list only contains keyboards I like. Also, Manna Harbour (the creator of the Miryoku layout) has a really good list here.